Chevrolet Trax: Line pressure check
Special Tools
GE-21867-A Oil Pressure Gauge Kit
For equivalent regional tools, refer to Special Tools .

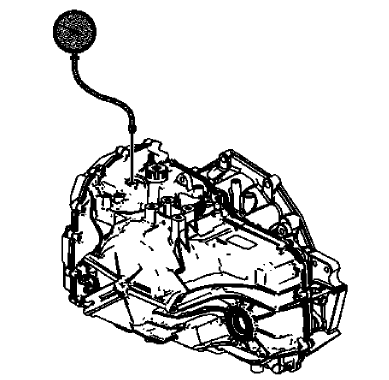
Fig. 6: Illustrating Line Pressure Checking
WARNING: Keep the brakes applied at all times in order to prevent unexpected vehicle motion. Personal injury may result if the vehicle moves unexpectedly.
- Install a scan tool.
- Start the engine.
- Inspect the transmission for the proper fluid level. Refer to Transmission Fluid Level and Condition Check.
- Use the scan tool to inspect for any active or stored diagnostic trouble codes.
- Inspect the manual linkage at the transmission for proper function.
- Turn the engine OFF.
- Remove the line pressure test hole plug.
- Install the GE-21867-A pressure gauge.
- Access the Scan Tool Transmission Output Controls for the Line PC Solenoid.
- Start the engine.
NOTE:
- In order to achieve accurate line pressure readings, the following procedure must be performed at least 3 times in order to gather uniform pressure readings.
- The scan tool is only able to control the line PC solenoid in PARK and NEUTRAL with engine speeds below 1500 RPM. This protects the clutches from extreme high or low line pressures.
- Use the scan tool to increase and decrease the Line PC Solenoid in increments of approximately 100 KPa (15 psi). The scan tool commands the increment values automatically.
- Allow the pressure to stabilize between increments.
- Compare the pressure readings on the scan tool to those indicated
on the GE-21867-A pressure gauge.
Refer to Solenoid Valve Pressure (Gen 2) .
- If the pressure readings vary greatly, refer to Fluid Pressure High or Low.
- Turn the engine OFF.
- Remove the GE-21867-A pressure gauge.
CAUTION: Refer to Fastener Caution .
- Install the line pressure test hole plug. Tighten the pressure test hole plug to 12 N.m (106 lb in).
READ NEXT:
 Road test
NOTE: The Road Test Procedure should be performed only as part of
the Symptom
Diagnosis.
Perform the road test in conjunction with the symptom diagnosis. Refer to
Symptoms - Automatic
Transmission.
 Torque converter diagnosis
Torque Converter Stator
The torque converter stator roller clutch can have 2 different malfunctions.
The stator assembly freewheels in both directions.
The stator assembly remains locked up in both
 Fluid leak diagnosis (non hybrid)
General Method
Verify that the leak is transmission fluid.
CAUTION: Do not clean using brake cleaner or other reactive solvents as
these
solvents can damage rubber gaskets, seals and bushings.
T
SEE MORE:
 DTC B1925 OR B2170 (without memory A45): Seat cushion heater sensor
SCHEMATIC WIRING DIAGRAMS
HEATED/COOLED SEAT WIRING SCHEMATICS (ENCORE)
KA1
Fig. 1: KA1
HEATED/COOLED SEAT WIRING SCHEMATICS (TRAX)
KA1
Fig. 2: KA1
DIAGNOSTIC INFORMATION AND PROCEDURES
DTC B1925 OR B2170 (WITHOUT MEMORY A45): SEAT CUSHION HEATER SENSOR
DIAGNOSTIC CODE INDEX
Diagnostic Instr
 Speedometer and/or odometer malfunction (encore)
Diagnostic Instructions
Perform the Diagnostic System Check - Vehicle prior to using this
diagnostic procedure.
Review Strategy Based Diagnosis for an overview of the diagnostic
approach.
Diagnostic Procedure Instructions provides an overview of each
diagnostic category.
Circuit/System De
© 2019-2025 Copyright www.chevtrax.com


