Chevrolet Trax: Front side door armrest switch mount plate replacement (driver side door, encore)
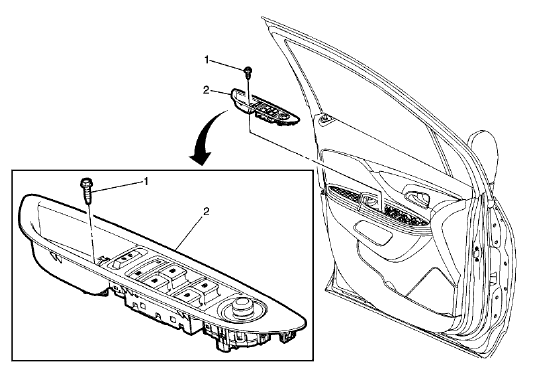
Fig. 3: Front Side Door Armrest Switch Mount Plate - Driver Side Door
Front Side Door Armrest Switch Mount Plate Replacement (Driver Side Door, Encore)
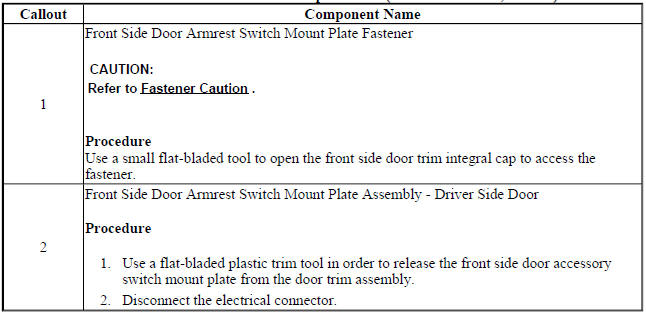
FRONT SIDE DOOR ARMREST SWITCH MOUNT PLATE REPLACEMENT (PASSENGER SIDE DOOR, ENCORE)
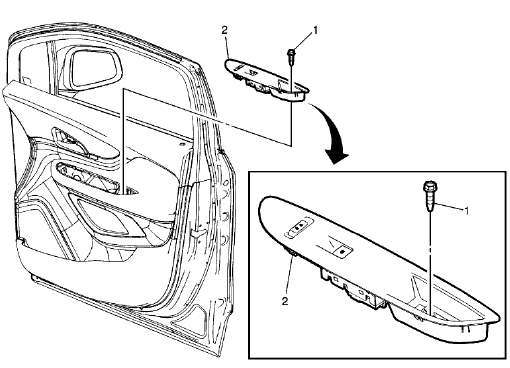
Fig. 4: Front Side Door Armrest Switch Mount Plate - Passenger Side Door
Front Side Door Armrest Switch Mount Plate Replacement (Passenger Side Door, Encore)
FRONT SIDE DOOR ARMREST SWITCH MOUNT PLATE REPLACEMENT (DRIVER SIDE DOOR, TRAX)
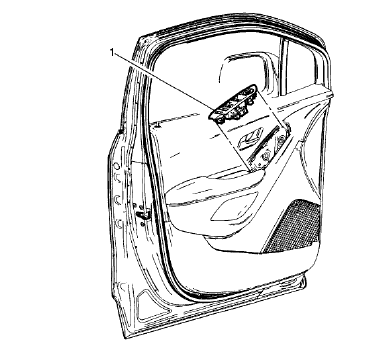
Fig. 5: Front Side Door Armrest Switch Mount Plate - Driver Side Door
Front Side Door Armrest Switch Mount Plate Replacement (Driver Side Door, Trax)
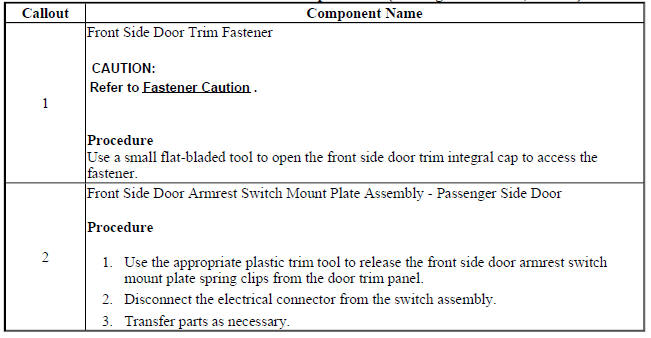
FRONT SIDE DOOR ARMREST SWITCH MOUNT PLATE REPLACEMENT (PASSENGER SIDE DOOR, TRAX)
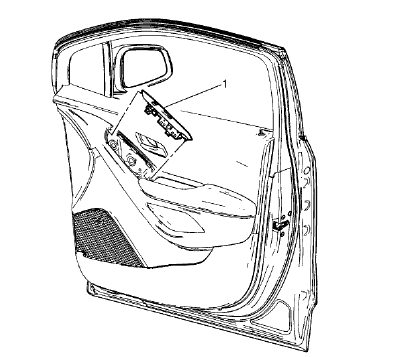
Fig. 6: Front Side Door Armrest Switch Mount Plate - Passenger Side Door
Front Side Door Armrest Switch Mount Plate Replacement (Passenger Side Door, Trax)

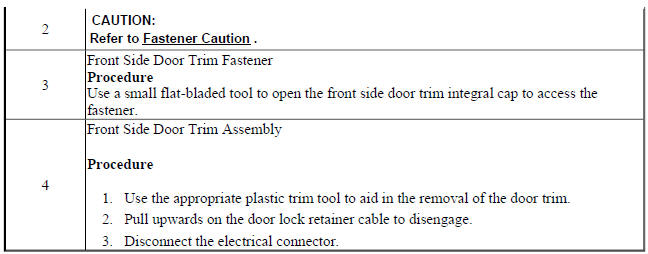
FRONT SIDE DOOR TRIM REPLACEMENT (ENCORE)
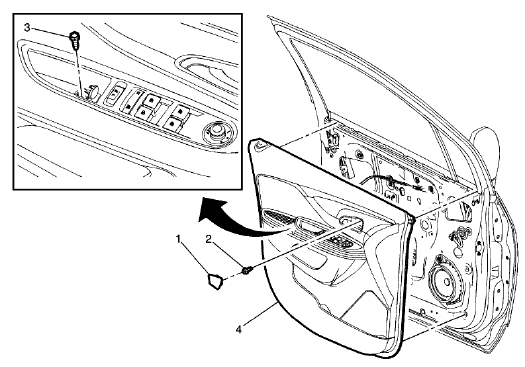
Fig. 7: Front Side Door Trim
Front Side Door Trim Replacement (Encore)

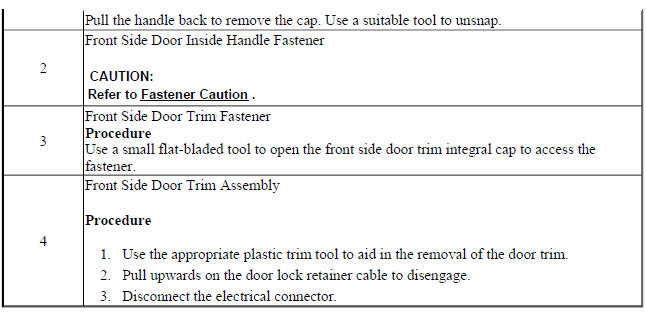
FRONT SIDE DOOR TRIM REPLACEMENT (TRAX)
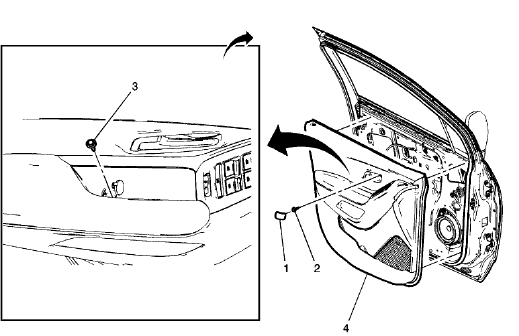
Fig. 8: Front Side Door Trim
Front Side Door Trim Replacement (Trax)

READ NEXT:
 Rear side door window garnish molding replacement (encore)
Fig. 9: Rear Side Door Window Garnish Molding
Rear Side Door Window Garnish Molding Replacement (Encore)
REAR SIDE DOOR WINDOW GARNISH MOLDING REPLACEMENT (TRAX)
Fig. 10: Rear Side Door Window G
Roof rail front stowage compartment replacement (encore)
Fig. 12: Roof Rail Front Stowage Compartment
Roof Rail Front Stowage Compartment Replacement (Encore)
ROOF RAIL FRONT STOWAGE COMPARTMENT REPLACEMENT (TRAX)
Fig. 13: Roof Rail Front Stowage Comp
Sunshade replacement (encore)
Fig. 18: Sunshade Assembly
Sunshade Replacement (Encore)
SUNSHADE REPLACEMENT (TRAX)
Fig. 19: Sunshade Assembly
Sunshade Replacement (Trax)
SUNSHADE SUPPORT REPLACEMENT (ENCORE)
Fig. 20: Sun
SEE MORE:
Differential carrier assembly replacement
Removal Procedure
Raise and support the vehicle. Refer to Lifting and Jacking the Vehicle
.
Drain the rear differential carrier. Refer to Differential Oil
Replacement .
Disconnect the propeller shaft from the rear differential and relocate
to the side. Refer to Two-Piece
Propeller Shaft R
Removing the Spare Tire and Tools
The spare tire and tools are located
in the storage compartment in the
rear of the vehicle.
Without Subwoofer
Wrench
Jack
Strap
With Subwoofer
To access the spare tire and tools:
Open the liftgate. See Liftgate
Lift the trim cover.
If the vehicle has a subwoofer
assembly on top of the
