Chevrolet Trax: DTC B3006: Hood ajar circuit
SPECIFICATIONS
FASTENER TIGHTENING SPECIFICATIONS
Fastener Tightening Specifications
.jpg)
SCHEMATIC WIRING DIAGRAMS
HOOD LATCH WIRING SCHEMATICS (ENCORE)
Hood Latch
.gif)
Fig. 1: Hood Latch
HOOD LATCH WIRING SCHEMATICS (TRAX)
Hood Latch
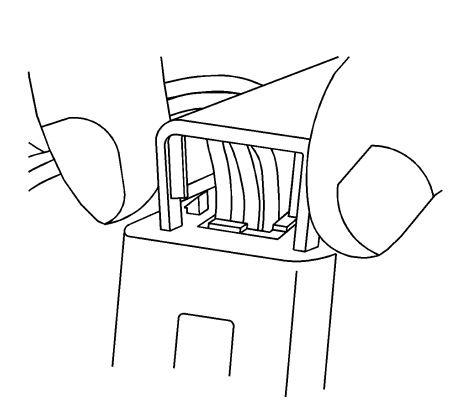
Fig. 2: Hood Latch
DIAGNOSTIC INFORMATION AND PROCEDURES
DTC B3006: HOOD AJAR CIRCUIT
DIAGNOSTIC CODE INDEX

DTC B3006: HOOD AJAR CIRCUIT
Diagnostic Instructions
- Perform the Diagnostic System Check - Vehicle prior to using this diagnostic procedure.
- Review Strategy Based Diagnosis for an overview of the diagnostic approach.
- Diagnostic Procedure Instructions provides an overview of each diagnostic category.
DTC Descriptors
DTC B3006
Hood Ajar Circuit
For symptom byte information, refer to Symptom Byte List .
Diagnostic Fault Information
.jpg)
Circuit/System Description
The body control module (BCM) applies B+ to the hood ajar signal circuit and monitors the voltage to determine the position of the hood. When the hood is closed, the switch is open and voltage remains high.
When the hood is open, the switch is closed and the voltage is pulled low.
Conditions for Running the DTC
The BCM continuously monitors for this DTC
Conditions for Setting the DTC
B3006 01
The BCM detects that the hood ajar switch signal circuit is shorted to battery.
B3006 02
The BCM detects that the hood ajar switch signal circuit is shorted to ground.
B3006 04
The BCM detects that the hood ajar switch signal circuit is open.
Action Taken When the DTC Sets
The hood ajar switch input will be ignored as a content theft deterrent trigger.
- Remote vehicle start (if equipped) will be disabled.
Conditions for Clearing the DTC
- A current DTC will clear when the conditions for setting the DTC are no longer present.
- A history DTC will clear after 40 malfunction free ignition cycles.
Reference Information
Schematic Reference
Immobilizer Schematics (Encore) , Immobilizer Schematics (Trax)
Connector End View Reference
WIRING SYSTEMS AND POWER MANAGEMENT - COMPONENT CONNECTOR END VIEWS - INDEX - ENCORE WIRING SYSTEMS AND POWER MANAGEMENT - COMPONENT CONNECTOR END VIEWS - INDEX - TRAX
Description and Operation
Keyless Entry System Description and Operation
Electrical Information Reference
- Circuit Testing
- Connector Repairs
- Testing for Intermittent Conditions and Poor Connections
- Wiring Repairs
Scan Tool Reference
Control Module References for scan tool information
Circuit/System Verification
- Ignition ON.
- Verify the scan tool Hood Ajar Switch parameter is Open when the hood is open and Closed when the hood is closed.
If the parameter does not change
Refer to Circuit/System Testing.
If the parameter changes
- All OK.
Circuit/System Testing
- Ignition OFF and all vehicle systems OFF, disconnect the harness connector at the B55 Hood Ajar Switch. It may take up to 2 min for all vehicle systems to power down.
- Test for less than 10 ohms between the ground circuit terminal C and ground.
If 10 ohms or greater
- Ignition OFF
- Test for less than 2 ohms in the ground circuit end to end.
- If 2 ohms or greater, repair the open/high resistance in the circuit.
- If less than 2 ohms, repair the open/high resistance in the ground connection.
If less than 10 ohms
- Ignition ON.
- Test for greater than 11.5 V between the signal circuit terminal B and ground.
If 11.5 V or less
- Ignition OFF, disconnect the harness connector at the K9 Body Control Module.
- Test for infinite resistance between the signal circuit and ground.
- If less than infinite resistance, repair the short to ground on the circuit.
- If Infinite resistance.
- Test for less than 2 ohms in the signal circuit end to end.
- If 2 ohms or greater, repair the open/high resistance in the circuit.
- If less than 2 ohms, replace the K9 Body Control Module.
If greater than 11.5 V
- Ignition OFF, disconnect the X4 and X7 harness connector at the K9 Body Control Module, ignition ON.
- Test for less than 1 V between the signal circuit terminal B and ground.
If 1 V or greater
Repair the short to voltage on the circuit.
If less than 1 V
- Test or replace the B55 Hood Ajar Switch.
Component Testing
- Ignition OFF, disconnect the harness connector at the B55 Hood Ajar Switch.
- Test for 2738-3350 ohms between the signal terminal A and the signal terminal B with the hood latch in the closed position.
If not between 2738-3350 ohms
Replace the B55 Hood Ajar Switch.
If between 2738-3350 ohms
- Test for 658-806 ohms between the signal terminal A and the ground terminal C with the hood latch in the closed position.
If not between 658-806 ohms
Replace the B55 Hood Ajar Switch.
If between 658-806 ohms
- Test for 2080-2545 ohms between the signal terminal B and the ground terminal C with the hood latch in the closed position.
If not between 2080-2545 ohms
Replace the B55 Hood Ajar Switch.
If between 2080-2545 ohms
- Test for 2738-3350 ohms between the signal terminal A and the signal terminal B with the hood latch in the open position.
If not between 2738-3350 ohms
Replace the B55 Hood Ajar Switch.
If between 2738-3350 ohms
- Test for 2080-2545 ohms between the signal terminal A and the ground terminal C with the hood latch in the open position.
If not between 2080-2545 ohms
Replace the B55 Hood Ajar Switch.
If between 2080-2545 ohms
- Test for 658-806 ohms between the signal terminal B and the ground terminal C with the hood latch in the open position.
If not between 658-806 ohms
Replace the B55 Hood Ajar Switch.
If between 658-806 ohms
- All OK.
Repair Instructions
Perform the Diagnostic Repair Verification after completing the repair.
- Hood Primary and Secondary Latch Replacement (Trax), Hood Primary and Secondary Latch Replacement (Encore)
- Control Module References for body control module replacement, programming, and setup.
READ NEXT:
 Symptoms - bolted exterior body panels and closures
IMPORTANT: The following steps must be completed before using the
symptom tables.
Perform the Diagnostic System Check - Vehicle before using the symptom
tables in order to verify that
all of the
Front end upper tie bar replacement
Fig. 3: Front End Upper Tie Bar
Front End Upper Tie Bar Replacement
HOOD PRIMARY LATCH RELEASE CABLE REPLACEMENT (TRAX)
Fig. 4: Hood Primary Latch Release Cable
Hood Primary Latch Release Cabl
SEE MORE:
Diagnostic Information and Procedures
STRATEGY BASED DIAGNOSIS
The goal of Strategy Based Diagnosis is to provide guidance when you create a
plan of action for each specific
diagnostic situation. Following a similar plan for each diagnostic situation,
you will achieve maximum
efficiency when you diagnose and repair vehicles. Although
DTC B305C: Immobilizer transponder of wrong type programmed
Diagnostic Instructions
Perform the Diagnostic System Check - Vehicle prior to using this
diagnostic procedure.
Review Strategy Based Diagnosis for an overview of the diagnostic
approach.
Diagnostic Procedure Instructions provides an overview of each
diagnostic category.
DTC Descriptor
DT
