Chevrolet Trax: Rear brake caliper bracket replacement
Removal Procedure
WARNING: Refer to Brake Dust Warning .
- Raise and support the vehicle. Refer to Lifting and Jacking the Vehicle .
- Remove the tire and wheel assembly. Refer to Tire and Wheel Removal and Installation .
- Remove the rear brake caliper. Refer to Rear Brake Caliper Replacement.

Fig. 50: Disc Brake Pads
- Remove the outer brake pad (1).
NOTE: The inner brake pad is equipped with the wear sensor.
- Remove the inner brake pad (2).
Fig. 51: Lower Brake Pad Springs
- Remove the upper and lower brake pad springs (1).
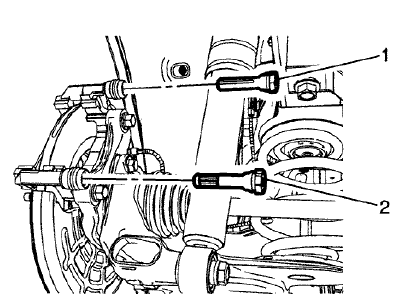
Fig. 52: Upper Brake Caliper Guide Pin
- Remove the upper brake caliper guide pin (1).
NOTE: The lower brake caliper guide pin is equipped with a bushing and must be installed in the same location.
- Remove the lower brake caliper guide pin (2).
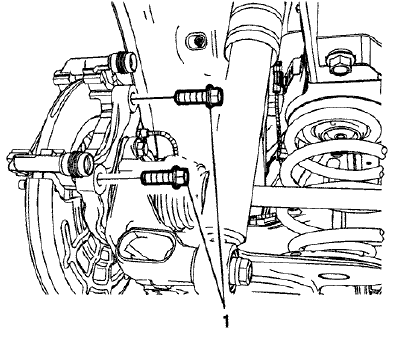
Fig. 53: Brake Caliper Bracket Bolts
NOTE: Do not reuse the brake caliper bracket bolts.
- Remove and discard the brake caliper bracket bolts (1).
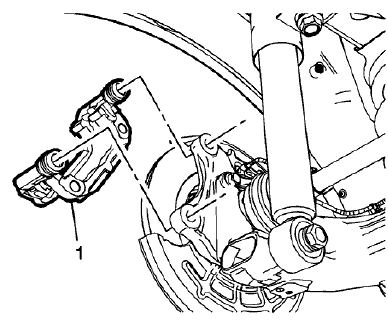
Fig. 54: Rear Brake Caliper Bracket
- Remove the rear brake caliper bracket (1).
Installation Procedure
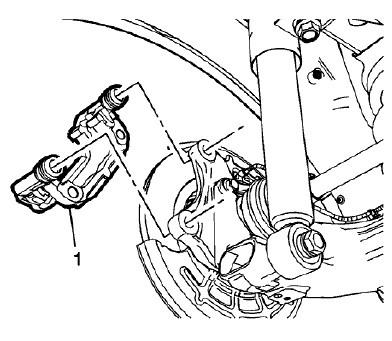
Fig. 55: Rear Brake Caliper Bracket
- Install the rear brake caliper bracket (1).

Fig. 56: Brake Caliper Bracket Bolts
CAUTION: Refer to Fastener Caution .
- Install new brake caliper bracket bolts (1) and tighten to 100 (74 lb ft).
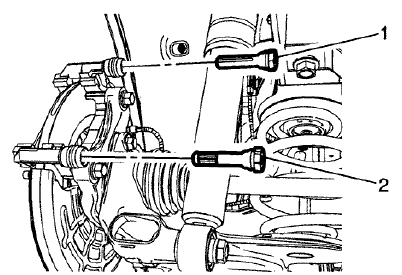
Fig. 57: Upper Brake Caliper Guide Pin
- Install the upper brake caliper guide pin (1).
NOTE: The lower brake caliper guide pin is equipped with a bushing and must be installed in the same location.
- Install the lower brake caliper guide pin (2).
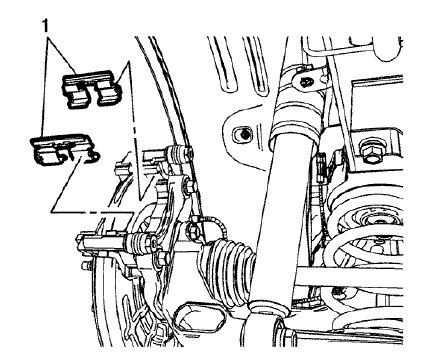
Fig. 58: Lower Brake Pad Springs
- Install the upper and lower brake pad springs (1).
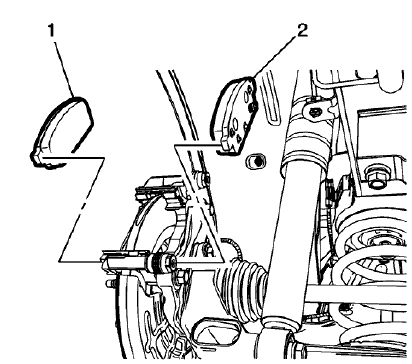
Fig. 59: Disc Brake Pads
- Install the outer brake pad (1).
NOTE: The inner brake pad is equipped with the wear sensor.
- Install the inner brake pad (2).
- Install the rear brake caliper. Refer to Rear Brake Caliper Replacement.
- Install the tire and wheel assembly. Refer to Tire and Wheel Removal and Installation .
READ NEXT:
 Front brake rotor replacement
Special Tools
CH-41013 Rotor Resurfacing Kit
CH-42450-A Wheel Hub Resurfacing Kit
For equivalent regional tools, refer to Special Tools.
Removal Procedure
WARNING: Refer to Brake Dust Warning .
Rear brake rotor replacement
Special Tools
CH-41013 Rotor Resurfacing Kit
CH-42450-A Wheel Hub Resurfacing Kit
For equivalent regional tools, refer to Special Tools.
Removal Procedure
WARNING: Refer to Brake Dust Warning .
Front brake shield replacement
Removal Procedure
WARNING: Refer to Brake Dust Warning .
Raise and support the vehicle. Refer to Lifting and Jacking the Vehicle
.
Remove the front tire and wheel assembly. Refer to Tire and Whee
SEE MORE:
DTC P0685, P0686, P0687, P0689, P0690, OR P1682 (LUJ)
Diagnostic Instructions
Perform the Diagnostic System Check - Vehicle prior to using this
diagnostic procedure.
Review Strategy Based Diagnosis for an overview of the diagnostic
approach.
Diagnostic Procedure Instructions provides an overview of each
diagnostic category.
DTC Descriptors
D
Cooling fan description and operation (LUJ OR LUV)
The engine cooling fan system is composed of one cooling fan, a series of 5
relays, the engine control module
(ECM), and the associated wiring. The cooling fan assembly includes two
resistors. This combination of
components enables the ECM to operate the cooling fan at 3 speeds using two fan
cont
